To allow for flexibility around journal entry postings and corrections, Microsoft Dynamics 365 Business Central lets users reverse entries. In this article, we’ll show how to reverse a journal batch in Business Central. The process on the front end is fairly simple because, in the background, Business Central will create a reverse entry with the same document number and posting date as the original, but with the opposite sign.
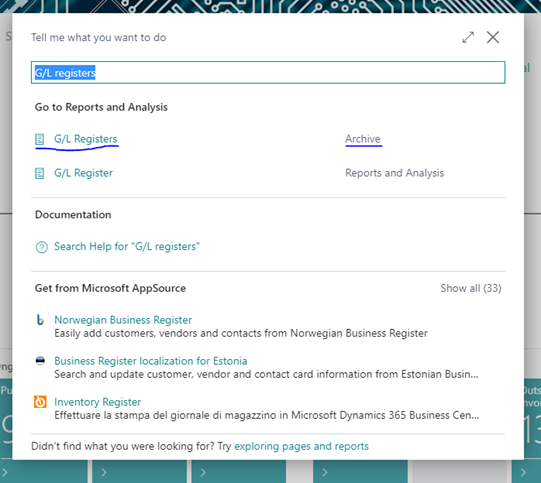
In this example, we’ll use General Ledger (G/L) Registers reverse lump sum functionality. To get started, you can use Global Search to find use G/L Registers. Select the one labeled Archive as shown below.

Filter to the Journal Batch Name you need to fully reverse by using the filter icon in the top right corner. This filter is case sensitive so the names must match exactly. If you don’t have the Journal Batch Name, you can apply filters to other fields to find the batch that needs to be reversed.


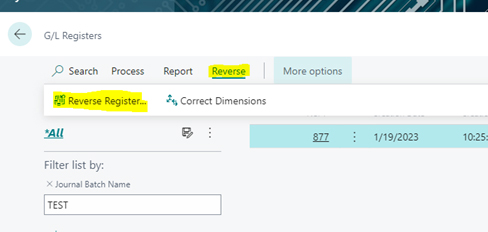
When you find the correct journal batch, select Reverse from the options above and then choose Reverse Register.

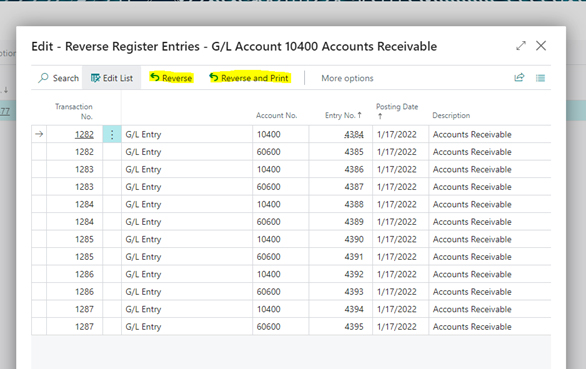
A new screen will appear as shown below. Verify these are the lines that should be reversed. Then select Reverse or Reverse and Print if you’d like a printed copy.

Once the batch has finished reversing, it will still appear in G/L Registers, but it will be marked as reversed. (You may need to personalize the page to add the Reversed column.)

That’s it! Now you know how to reverse a journal batch in Business Central.
For more helpful tips and guidance, connect with the Business Technology Solutions Team at Forvis Mazars. We are a Microsoft Dynamics Gold Partner and 2022-23 recipient of the Microsoft Inner Circle award. We provide analysis, design, implementation, upgrades, training, and support services for Business Central and other Microsoft Dynamics business applications.
