Personal views often are created to segment or track Accounts, Contacts, Leads, and Opportunities that are important to you. Personal views in Microsoft Dynamics 365 let you see a particular set of records filtered by specific criteria. If you’re working with a project team, collaborators, or a manager, sometimes it can be helpful to share a view.
How to Share a View in Microsoft Dynamics 365
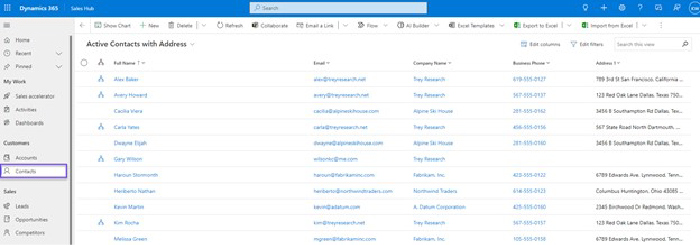
- Navigate to the section for which the view was created, e.g., Contacts:
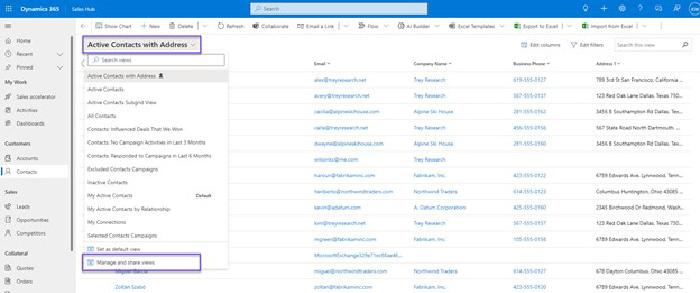
- Click on the View drop-down menu and select Manage and share views:
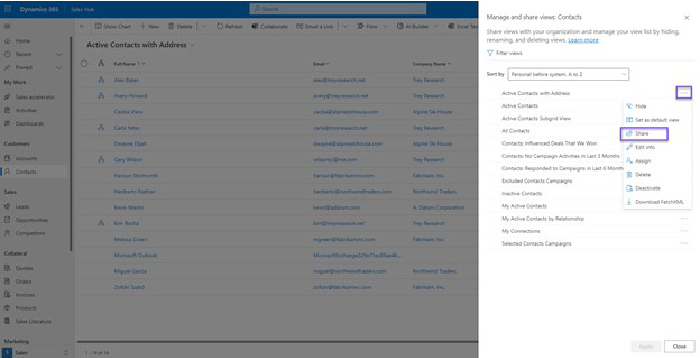
- You’ll see a list of your saved views. Select the ellipsis button next to the view you’d like to share, then select Share:
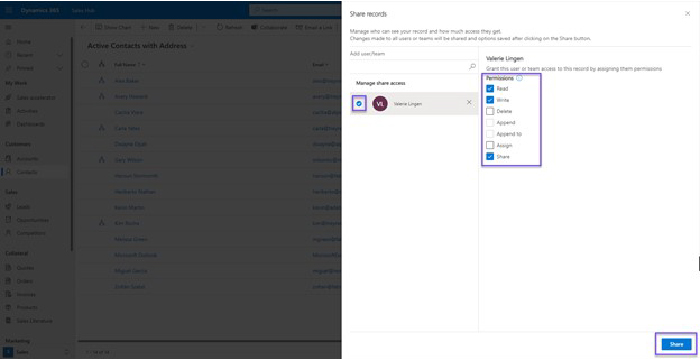
- On the Share records screen, you can either search for the name of the user or team with whom you’d like to share the view, or you can click on the magnifying glass icon to scroll through either list:
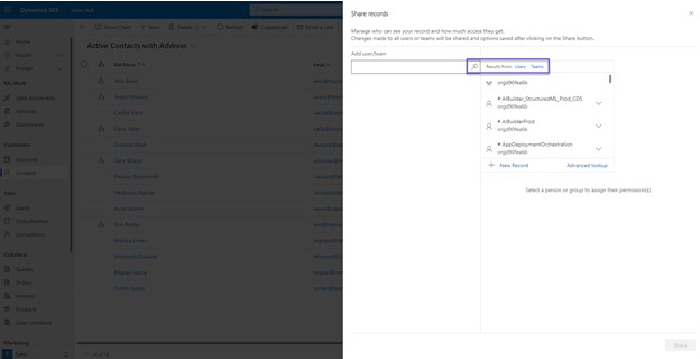
- Once you select the appropriate users or teams, you can grant specific permissions to each user or team. After permissions have been selected, click on the Share button near the bottom.
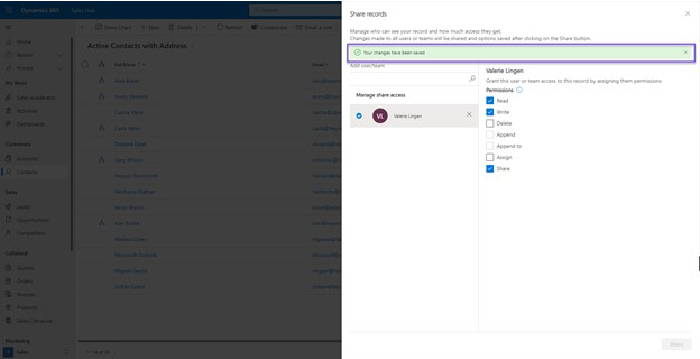
- Once the system processes the updates, a notification will display confirming that your changes have been saved:
That’s it—now you know how to share a view in Microsoft Dynamics 365!
What other Microsoft Dynamics 365 questions can we help you answer? Take advantage of our technology consulting and support services to assist with everyday challenges and big-picture concerns.
The Business Technology Solutions Team at Forvis Mazars is a Microsoft Dynamics Gold Partner and 2022 recipient of the Microsoft Inner Circle Award. We assist clients by providing analysis, design, implementation, upgrades, training, and support services for Microsoft Dynamics 365, Microsoft Dynamics GP, and marketing automation business applications.
